Friday, December 31, 2010

2010 Memories, Thank Yous and more...

Here is a look back at the things that I celebrated this year, the people in my life, thank yous and so much more. 2010 was definitely a time for change and big ones at that! I can't wait to see where I am at this same time next year!

Here are some of my most memorable events...

Real Parties
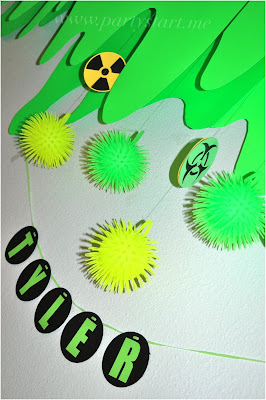
Hazardous Teen (Real Party)
 My son's 1/2 birthday, my first dessert table display.
Princess & Pirates (Real Party)
My friends allowed me to take over their daughter's birthday party and go to town with my first printables. Thanks M &N!

My Daughter's Shabby Chic Fairy Party (Real Party)
This is the party where I started working with Stix-N-Pops. LOVE'd her Fairy Marshmallows! One of my most favorite parties this year.

My Son's Mustache Bash (Real Party)
The Mustache Bash, this is when I really got to know Jen from Blush Printables. She helped me make this party everything I ever hoped it would be!


Collaborations

photography by Sadie Days Photography
 I was SO extremely lucky to be able to work with so many insanely creative people this year. This photo of my daughter is cherished not only because she is in it, but also because it is from my first collaboration and represents the magic of new friendships!

Here is the long list of amazing NEW Friends I have because of collaborations this year

 My New York Experience

It was such an honor to receive an invitation to Martha Stewart's Bloggers Night Out event in New York City. Of course it wouldn't have been possible without the support of my little family, ALL of my amazing friends, old classmates and blogging besties who donated funds to get me there! 

Martha Stewart Headquarters

Amy Atlas & Me

Me, Kate, Danielle, Brandi
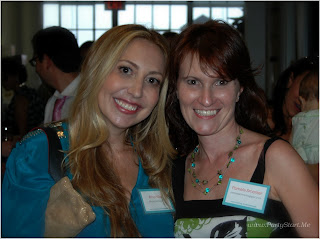
I of course loved meeting Martha and her amazing staff it was a dream come true, but I think the best part was getting to meet my fellow bloggers who constantly inspire and amaze me with their talent.
  Kristy from Posh Pixels 
Brandi from Tweedle Dee Designs
Jay from Maples Cakes
Danielle from Lucky Life
Stacy from Scrumptious Swirls

Friends
 These are some amazing people who helped me through this year and even though they are behind the scenes they helped me to get to where I am now. 

Dawn who stood by me when my life seemed to be crumbling around me, who is always a text away,  helped me cut and tape more favor boxes in a short amount of time then we ever thought possible. OH yeah and puts up with my "anal-ness" LOL

Terry from Creative Cuts and More who introduced me to the fabulous world of 3D paper creations and for constantly telling me how much she loved my work and giving me positive criticism when she new I could do better! 

Karie, my blogging bestie who I met 3-4 years ago when blogging was new to me. She has been my greatest cheerleader! Someday we will meet in person! 

Kim, Kristy, Staci, Debbie, Lelan, Genevieve, Brandi, Jillian & Rebekah for helping me celebrate more then one anniversary/birthday

Carrie and Robin who helped me pull together my first Party Starters open house and for celebrating my birthday with some funky green shots

My Family

Al my DH...my best friend, my technical support, the guy who listens to all of my party world drama!

My Kids, Tyler, Corbin & Aly who let me share their birthday parties with the world and are patient with me when "Mommy is working"

My parents, for not killing me when I was a child for constantly drawing on the walls inside and out.


Features & Press
I am still blown away when people comment on my work and even more stunned when my work is featured on other sites. Thank you to ALL of my friends who share what I love to do. 
Here are just a few features that happened this year


This feature blew me away and I was so completely honored and humbled that Beth Beattie PR, Branding & Events included me in her "Must Haves" page in Pregnancy Magazine in October.
Pregnancy Magazine
New Adventures

In November I was contacted by My Grafico to be their Head Party Planner. Over joyed with the idea of working with a new crew of graphic artists and creating party display each and every month, I jumped at the opportunity!  
Here are some of the parties of have styled for My Grafico and their artists

Printables by Blackleaf Studio
Artwork by Sanqunetti Designs
Printables by Zboooh Design Studio

There are just so many things that happened this year that I never in my wildest dreams would have imagined were possible. After writing this post I see a constant, which is new friends! I have been so extremely blessed and consider 2010 to be the year of Friendships.

To think 2010 all happened because of a party favor boxes shaped like a cake... 
we've come a long way baby!

Happy New Year Friends!!
Here is to many more new friendships, collaborations and parties!

Thursday, December 30, 2010

Owl Party

It is hard to believe another year is about over. Where does the time go? My kids are growing up so fast! My son Tyler said to me yesterday that he can't believe he is 14 years old already. My response, "I can't believe I am 38 already".  Now some of you might be thinking didn't Pam just have a party for her son, well yes 6 months ago. Since Tyler's birthday is 3 days after Christmas we celebrate a 1/2 birthday in the Summer with my husbands side of the family and his friends. On his real birthday we celebrate with just my side of the family, keeping it small. Although the party is much smaller I don't want to down grade the importance of his special day. Like I said in an earlier post Tyler has enjoyed reading the Guardians of Ga'hoole series, which is about Owls, hence the Owl themed party. So without further ado..


There were only 9 of us, 5 of which actually eat cake and other sweets, so there was no need for plates upon plates of goodies. The party was held after dinner, so no need for appetizers or beverages on the table. Like I said this was a small party and the only thing we needed was the birthday cake, although some blue cake pops managed to make their way onto the table.


This is my sad sorry attempt at creating an owl cake, although Tyler seemed to enjoy it quite a lot.
It had 5 layers of homemade chocolate cake & buttercream frosting. SO delicious, not so attractive and could have fed about 20 more people. We will be eating cake for a while!


Every birthday cake needs candles, so this bird got a flaming mohawk!


After creating this display it reminded me of making dioramas in Elementary school. I always loved creating scenes within shoe boxes to tell a story. Its fun to do the same thing only on a much larger scale as an adult! YEAH for letting my inner child out!!

Thanks for stopping in!
Hugs,
Pam

Wednesday, December 29, 2010

Bring On The Cake!

Today's post should pretty much cover it all when it comes to cakey goodness.  A great Vegan cake recipe, cupcake favors and cupcake decorations!


First up, this fun printable Cupcake Party collection created by Zboooh Design Studio. I love the gingham pattern used in this set and thought it would look adorable displayed on my daughter's play kitchen. I love using my kids favorite toys as props and this worked out perfectly.


The tags in this collection reminded me of old time jelly jar labels, which got me inspired...Cupcake In A Jar! I love sending home favors and this one is just so fun. Who wouldn't want to go home with a cupcake or two to enjoy later. I used a pint size mason jar, which fits two cupcakes with plenty of frosting. Take off the cupcake wrappers, place one cupcake in the bottom, pipe on some frosting, add some sprinkles and repeat each step a second time. Print out the label, cut and adhere to the front of the mason jar, SUPER EASY! I spruced it up a bit by adding a cupcake topper printable to the lid along with some gingham ribbon in three different colors along with a cupcake pick for decoration.


You can read more about this collection over at MG Party Impressions, where I have posted all of the details. This collection will also be available in my Etsy shop on January 10, 2011, customized, printed and assembled just for you!!

Now for the best chocolate cake recipe I have ever made...tasted...ok...drooling over here! My Mom made this cake for me growing up and I never realized the whole time that is was Vegan...which has been a nice little bonus for all of my friends with food allergies or of course who are Vegan. This cake is super easy to make, dense and moist.

Quick Chocolate Cake
Combine in large bowl
  • 3 C flour
  • 2 C sugar
  • 6 tbls cocoa (either milk chocolate or dark, both are delicious)
  • 2 tsp baking soda
  • 1 tsp salt
Add
  • 2 tsp vanilla
  • 2 tbls vinegar
  • 2/3 C + 1 tbls vegetable oil
  • 2 C + 1 tbls warm water
Beat well and pour into greased 9"x 13" pan. Bake at 350 degrees for 30-35 minutes.


For my son's birthday yesterday I used this recipe to make his 5 layer cake (2 batches). Here you can only see 4 of the layers. OH and of course I ruined the Vegan-ness of this cake by adding buttercream frosting.
The recipe for buttercream is the most amazing I have made which came from Brandi of Tweedle Dee Designs. I could literally eat a bowl of this frosting with a spoon. I would most likely feel like crap after, but yes it is that good!

Buttercream Frosting
Beat together
  • 1 C butter
  • 3 C powdered sugar
  • 2 Tbls Heavy Cream
  • 1 tsp vanilla 

I added about 1- 2 Tbls Hershey Syrup to get the brown I wanted for this cake, plus it added a hint of chocolatey goodness to the recipe. SO GOOD!!

Alright, hope you have been inspired to think out side of the box with your favors, displays and a new recipe...I am off to eat some cake! WHAT...its lunch time...

Hugs,
Pam

Tomorrow...Tyler's Owl Party, here's another sneak peak...

Tuesday, December 28, 2010

Owl's Make One HOOT Of A Party Theme!


Just wanted to pop in quick and give you a little sneak peak of the party I am working on today. It is my son, Tyler's birthday and he is a big fan of the book series "Guardians of Ga'hoole". So guess what the party theme is...Owls of course. This photo is the beginning of my backdrop. We are having a small celebration tonight, so a table display will be perfect.
I will be back later with my favorite cake and icing recipe along with photos from the party later this week!

Hope you all had a wonderful holiday/long weekend!
Back to work...Hugs,
Pam

Thursday, December 23, 2010

Taking a short break...

image from Fight Pink
Taking a break to celebrate the holidays AND prepare for two of my kids's birthdays. Ty, our oldest turns 14 on the 28th and our youngest, Aly turns 6 on January 6th.
I am also excited to be loading new items into our Etsy shop in the New Year!  SO, as you can imagine, lots and lots to get done over the next couple of weeks.
I will be back next week with some sneak peeks and party pictures!

A VERY Happy Holidays to you and yours!
Hugs,
Pam

Friday, December 17, 2010

12 Days of Christmas~ Day 12 {Just Keep Swimming}

This quote seems extremely appropriate this time of year...OK anytime of year really. Sometimes that is all you can do when life gets crazy..."just keep swimming".  SO for my 12th Day of Christmas Crafts and Party Favors, my gift to you, "Just Keep Swimming" note cards. Print a bunch of these out, tie them together with some A2 envelopes and pretty bakers twine and give them out as gifts or party favors. I may just frame one of these as a reminder to never give up and to keep dreaming BIG! You can download your FREE "Just Keep Swimming" note cards HERE


Thank you SO very much for your continued support and kind words of encouragement. You are the very best bloggy friends a girl could ask for! I wish you all a very happy holiday season!

As always...Hugs,
Pam

Thursday, December 16, 2010

12 Days of Christmas~ Day 11 {Gingerbread Houses}

Making gingerbread houses have been a tradition in our house for the past 8 years. Every year I buy a kit with all of the pieces already created, with three kids its just easier!
This was Aly's first time making a graham cracker house in Kindergarten and I was really impressed by how creative all of the kids AND their parents were. Maybe I was more impressed with how many parent helps there were and how totally into this project they were, me included!
The first step was to take a washed out milk carton and using Royal Icing stick pieces of graham crackers around the box. Super easy for little kids! Then comes the decorating...lots and lots of candy, pretzels, cereal and of course frosting!

Here is the recipe we used to make the Royal Icing:
1 pound of powdered sugar
1 tsp Cream of Tartar
3 Egg whites

Mix all three ingredients then beat/mix on high for 7 minutes until frosting shows stiff peaks. Make sure to keep this frosting in an air tight container so it doesn't harden up on you.


Here are the houses that our family made this past weekend. SO much fun and probably the quietest moment all weekend long. Lots of concentration going on!!

Aly's House
Corbin's House
Tyler's House
Al's House
Pam's House


I hope you think about creating your own little edible village, whether its made out of gingerbread or graham crackers.

Happy Holidays!
Pam

Wednesday, December 15, 2010

12 Days of Christmas~ Day 10 {Crayon Favors}

I would just like you all know that while I am a crafty, artsy kind of person this month has been insane! I have never had so many crafting blunders in my life! There have been a few crafts that I have attempted to make for you all and they were disasters! I don't know what it is... I'm sorry to say this, but I will be happy when this blog series is done! LOL!!


Anyway, now that I have that out of the way here is craft/party favor number 10, recycled crayons. I found this craft on Martha Stewart and while it was rather simple, I still managed to mess it up...LOL! First of all...ONLY use regular Crayola Crayons! Do not use washable or cheap crayons. I had a bunch of the cheap non brand name crayons that I used in my first batch and after they were baked, it looked like someone barfed in the pan,  the wax floated to the top the colors mixed making brown and their were still chunks of crayon, so not pretty!! USE Crayola!! (unfortunately I was not paid to say that...LOL)

Supplies:
Kitchen knife
Old crayons
Mini-cake tins

Crayon How-To
1. Parents can use the knife to chop crayons into pea-size pieces, taking care to keep colors separate so kids can combine them as they like.
2. Preheat the oven to 150 degrees while children fill the tin with crayon pieces, arranging them in interesting designs.
3. Bake just until the waxes have melted, 15 to 20 minutes.
4. Remove the shapes after they have cooled. If they stick, place tray in the freezer for an hour, and the crayons will pop out.

Read more at Marthastewart.com: Crazy Crayons - Martha Stewart Kids

Actually I used an old cupcake pan to melt my crayons in, which worked out fine, since I didn't have a cute shaped pan or mold. I then wrapped three crayon rounds up in a cupcake wrapper then using cellophane tied the crayons up to look like a colorful candy.
These are really very simple and I do want to make more in fun shapes, so that I can package them up in my mini gable boxes for party favors!

Happy Holidays!
Hugs,
Pam

Tuesday, December 14, 2010

12 Days of Christmas~ Day 9 {Holiday Card Display}

On the 9th day of our Christmas Crafts blog series I wanted to show you a super easy project that I made all because I was inspired by this really cool card holder frame at Pottery Barn.

I really don't have an extra $200 laying around to purchase a frame like this, so I made my own for around $2. Here is how I did it...

Supplies Needed:
  • Large Picture Frame (just the frame, no glass or backing)
  • Twine or Ribbon
  • Mini Clips
I found this frame at a garage sale this summer for $1 and grabbed it, because I know how expensive frames are new in the store and figured I would be able to use it for something! This frame isn't in the best shape, it was originally painted gold, I think then painted over again in white and distressed. It has a vintage feel and looks a little better in person. While I would love for the frame itself to be a little thicker in size, beggers can't be choosers! A lot of times you can pick up frames at 2nd hand stores for cheap. Don't pay attention to the 1970's paintings on the inside...just look at the frames! You are going to get rid of the inside anyway. 


Now grab some twine or ribbon. I used "Maraschino" bakers twine from The Twinery. I am absolutely in love with all of their twine AND their customer service is fabulous!!
The "Mini Library Clips" are from Stampin' UP! These are just the right size and strong enough to hang on to your card and twine.  I have a great Stampin' Up demonstrator if you don't have your own.


On the back of my frame their were those little metal tabs that you can bend to keep the photo and glass in place. I wrapped my twine around these tabs and bent them back on to the frame instead of down and flat. This held onto the twine very securely, but you can always add glue if needed. If your frame doesn't have these tabs, you can staple your twine or ribbon down or use flat thumb tacks.


 Here you can see that I just went back and forth wrapping my twine around each tab to create a uniform "web".


When you are finished add your holiday cards with the mini clips.


Again super easy and this project can be really inexpensive! If you receive lots of holiday cards, then make several of these frames and hang them along one wall. What a beautiful display this would make!

Happy Holidays!!
Hugs,
Pam

Sunday, December 12, 2010

Diary of a MOMpreneur {December 2010}

WOW it has been a while since I have done a Diary entry...can you say craziness??? Of course I couldn't be more happy with how things are moving along and how Party Starters is evolving. I will just keep swimming and see where the future takes me.


I am sure you have all heard that I was asked to be the lead Party Planner. There are NO words to describe how much I am loving this new position and a part of such a great group of designers! I get to set up party after party every month...LOVE IT!! Here are photos from the first party I created for the My Grafico party blog called MG Party Impressions. A Jungle themed birthday, which would also be super cute for a baby shower!


This party collection was created by Blackleaf Studio, you can purchase the DIY printable collection HERE. Starting in January I will be selling this collection already printed, assembled AND I will customize the invitations, place cards and party favor toppers for you! So excited about this!!!

Another fun perk of this job is that I am also creating party printables using the amazing artwork created by the My Grafico designers. Here is my very first printable collection that I designed using clipart and pattern papers from Sanqunetti Designs. This Milk and Cookies party printable collection is not just for Christmas though, it has a ton of Birthday pieces as well as blank pieces that you can customize yourself! YES, this collection will also be available in my store in January 2011, printed, fully assembled and of course customizable! SO EXCITED!! You can find this DIY printable collection as well as the clipart and digital pattern paper HERE.


 I have lots more parties themes in the works, with my oldest son's (real) birthday on the 28th of this month, then my daughter's (real) birthday on January 6th. LOTS to do this month!! OH yes and I am officially my daughter's Daisy Troop's "Cookie Mom", so I will be starting all of that here real soon too!! Just not enough hours in the day...seriously!!

Anyway just wanted to share a tiny little portion of what I have been up to. See you on Monday with Day 9 of my 12 Days of Christmas Crafts and Party Favors!

Hugs,
Pam

LinkWithin

Related Posts with Thumbnails