Showing posts with label Martha Stewart. Show all posts

Monday, March 3, 2014

Spring Oreo Cake

One of the most popular images on my blog according to Pinterest is the photo I took of the Oreo cake at Martha Stewart's Blogger's Night Out back in 2010.


Back to the cake, when I see my photo pinned there are usually comments like, "how was this put together?" or wouldn't this be fun on a smaller scale. SO I am sharing what I have learned from doing this myself.

Here is what you need:

3 packages of Spring Oreos ( they have yellow filling and some of the cookies have "Spring" time images on them).
An 8" in diameter cake plate or cake stand

Step 1. Starting on the outside place 10 qty Oreos around the edge of the cake plate so that they create a circle and are all touching on the sides. fill in the center with approximately 3-4 Oreos (I used the chipped or cracked ones for the inside since you won't see them).
Step 2. Start your next layer on the outer edge placing each cookie on top of where the bottom two cookies touch each other. Just like you would lay bricks. Keep going all the way around and fill up the center too.
Step 3. Repeat the process until you have 6 layers of cookies.


Just like the cake at Martha's event, nothing holds it together, just the weight of itself. How do I know, well because I watched a lady back into the cake and half of it fell on the floor. LOL I also tried going a bit smaller in diameter and it just didn't look right, I am sure it's a math thing LOL. Maybe you could go smaller if you use the mini Oreos, but that would take a of cookies! I want to say the original cake at Martha's took 30-40 packages of cookies, but I could be wrong. I know it was a TON though.

I am definitely going to do this smaller scale cake again for a party here at home and serve small glasses of milk with it.  I will also make it with the Mint Oreos, how pretty would that be with the dark brown and mint green...YES!

Have fun trying this and please share if you do! Don't limit yourself to Oreos, you could play with any sandwich type cookie.

DFTBA,
PS


Tuesday, February 1, 2011

Sweet Little Bag {Tutorial Tuesday}

Well I am going to cheat a bit as I have been completely swamped all weekend, plus my kids are off today. Not from a ton of snow, its because of the frigid temperatures. Only -8 degrees right now at 9:30AM...brrrr! SO I am hoping to catch up here in the next few days and get a breather by this weekend. Anyway, I wanted to share a video tutorial that I came across on my many trips to the Martha website. I think this is the sweetest little bag and totally want to try it...someday! You can find the video tutorial and instruction HERE.


What a great party favor bag this would be for a ladies night out!
Thanks so much for stopping in! I am off to style a party display...this one is for all those little Superheros! Can't wait to show you.

Hugs, 
Pam

Wednesday, December 1, 2010

12 Days of Christmas~ Day 1 {Yarn Snowflakes}


Welcome to day one of Party Starters 12 Days of Christmas Crafts and Party Favors For Kids series. Today I wanted to start our series with a cute craft I found over on Martha Stewart's craft blog. I had my 5 year old daughter, Aly help me make these yarn snowflake ornaments. These were a bit frustrating for her, but once we figured out which steps she could do herself and which ones I needed to help her with it became a fun project.

Here is what you need: 
  • White School or Craft Glue
  • a small bowl to pour some glue into
  • white yarn
  • scissors
  • piece of 8 1/2" x 11" paper
  • marker (any dark color)
  • wax paper
  • chunky glitter (optional)

Step one: 

Draw some snowflakes on your white paper. Aly started out drawing traditional shaped snowflakes, but after trying to lay pieces of yarn in these patterns it soon became messing and really just a nightmare. Obviously, Martha's people thought this through and have you design "loopy" snowflake images. 

Step two:


Pour a few tablespoons of white school glue into a small bowl. Place a piece of wax paper over your snowflake patterns. We taped ours down to the counter so that it wouldn't move on us. Without cutting your yarn, pull out a large piece so that it is easy to work with. Dip a 6 inch section in your glue then lay the glued piece of yarn onto your wax paper following the pattern. Dip more yarn in your glue as you go, then cut your yarn when you have finished your pattern. It was easiest for Aly to dip the yarn in the glue and I traced the pattern.

 Step three:

While your yarn is still wet this is when you will want to add glitter. This was a step that Aly found very enjoyable! She is the glitter master...watch out Purple Pug! Let your snowflakes dry for a few hours or if the glue is thick over night is best. You want these to be really stiff to hold their shape. 

Step four:

Use a pretty ribbon or piece of gold thread to make a hanger for our yarn snowflake ornament. 

Step five:

ENJOY decorating with these fun and unique sparkly snowflakes!

I really do think these look better with glitter on them, but of course that is optional. Aly was so proud hanging these up in our front window for everyone to see. SO cute!! They would make really cute gift packaging decorations too!

Make sure you stop back tomorrow for another fun holiday craft, this one is a sweet party favor!
Hugs,
Pam


Tuesday, September 28, 2010

Party Starters' Halloween Inspiration Week day 2


When it comes to Halloween inspiration the first place I look to is of course Martha Stewart. After all she is the Queen of Halloween!


Last year the kids and I made these cute and cuddly Sock Skeletons. It was a great way to teach my then 10 and 12 year old boys how to use a needle and thread while creating something spooky that even they enjoyed. Take a peek at the how to HERE.


Another fun Halloween idea are these Ghost Necklaces, which I know my daughter will want to make! Directions can be found HERE


 How about creating a stamp out of a potato or even a pumpkin. Again a great idea for kids to get creative and most likely messy! You can find the directions HERE


For those of you who know me, I simply can't leave out the sweet treats. Here are some cute Whoopie Pies, gonna have to try these out myself...look too good not to. Directions HERE


One more treat, Orange Jack-O-Lanterns filled with sorbet. I bet these are as refreshing as they are adorable. Another must!! Directions HERE


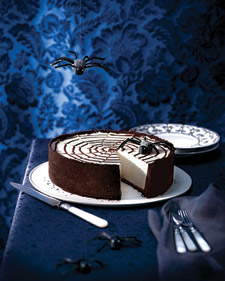
OK promise this is the last one...Simply can't resist cheesecake and look at how spook-a-licious this one looks. Fork PLEASE!!! Directions HERE


  A big thank you to my friend Chantelle for bringing some of these to my attention. If you have any inspiring Halloween ideas whether its crafts or treats, feel free to send me the link!

Stay tuned more Halloween ideas tomorrow!

Hugs,
Pam

Thursday, September 23, 2010

The Boo Crew's Halloween Party for Adults

Today I am thrilled to show you the Boo Crew's Halloween Party for the older crowd. Whether you are throwing a party for Teens or an Adult crowd, these party supplies would be perfect!

Just like the Children's party I posted yesterday, I brought together extremely creative woman (we call ourselves the Boo Crew) and with their products and a few of my own, I styled this display. While this display is much smaller then the Children's party it still packs a spooky punch!  I hope it inspires you to create a fabulous party this Halloween.

Photography by Sadie Days Photography

Ally from Girly Gatherings made cookies to match Blush Printables Tags.

Cupcake Picks by Go Against The Grain, cupcake wrappers by Party Starters, Caramel Apple Cupcakes by Red Velvet Stefanie

Invitation and Tags created by Blush Printables

Tags by Blush Printables & Test Tubes by Martha Stewart

Mini Favor Bags with Moon and Tree design by Party Starters

Cookies by Ally from Girly Gathering

Cupcake Picks & Straw Flags by Go Against The Grain

Labels by Blush Printables


I had so much fun printing out Blush Printables' Vintage Gothic collection to make the framed invitation, the tags for the test tubes and the labels on the bottles of Raspberry Lemonade and upcycled Starbucks bottles.  The cookies from Ally were so spooky, my boys LOVED them! The Caramel Apple kits from Red Velvet Stefanie were everyone's favorite... I loved baking these and decorating them with OMG the best vanilla icecream frosting! SO good! Last but certainly not least my favorite little touch on this table the picks and straws created by Go Against the Grain. Extremely elegant, but fit in so perfectly with this display!  In case you were wondering, YES I did make those mini favor bags, which are now available in my Party Starters shop!

Once again here is the 2010 Boo Crew and a list of their sites and what they contributed!
  1. Jen from Blush Printables: made Adult and Children's Invitations, Children's cupcake picks, tags on bottles & test tubes from the adult table.
  2. Sandy from Sandy's Baking Memories: Made the children's table cookies, with names on them and Halloween Shapes
  3. Charlotte from The Paper Cupcake: Made the Stickers, water bottle labels for the Children's table
  4. Brandi from Tweedle Dee Designs  Made the tutus
  5. Kristy from The Purple Pug:  Made the 3 Big Circle "flags" on the Children's table (the ghost, bat and candy corn)
  6. Tammy from Milk & Cookeez:  Made the rock candy soap sticks (children's table)
  7. Nicole from Two Savvy Sisters : Made the Children's table banner that said "Happy Halloween"
  8. Genevieve from Celebrate Today The Super Chick Way: Made the "Kandy Kones"
  9. Amy from Tiny Giraffe: Made the "BOO" wood blocks
  10. Laurel from Go Against The Grain : Made the cupcake flags and straws that were on the Adult table.
  11. Ally from Girlie Gatherings : Made the Adult table cookies that matched the tags and invitation by Jen.
  12. Elizabeth from StixNPops : Made the marshmallow creatures on the sticks
  13. Stefanie from Red Velvet Stefanie: Sent the cupcake mixes to make Blue Velvet  & Caramel Apple cupcakes
  14. Tommie from Oh My Gluesticks : Made the little pop tent signs that said "Witches' Brew", "Creepy Cupcakes" etc. Also made the image that was printed on the kids t-shirts. 
  15. Bonnie Bubb from Sadie Days Photography: Photographer 
  16. Pamela Smerker from Party Starters: Project coordinator, Party Stylist, Candy Corn Favor Boxes, Cupcake Wrappers, Candy Bar wrappers, Mini favor bags.

A huge shout out once again to my friend and newest Party Starters team player, Dawn for helping me the day of the shoot. I couldn't have done it without her help!! Thanks Dawn!!!

Thank you so much for stopping in and checking out our party. It was really such a blast to put together, I can't wait to do it again!! 

Hugs,
Pam

Friday, December 18, 2009

Doer Of The Week Gallery & Holiday Wishes!

We just received the latest edition of Martha Stewart's "Dreamers Into Doers" newsletter. In this issue they have a link to a special gallery they have created for the "Doer Of The Week" from 2009. You can check us out on page 2!

Party Starters wanted to take a moment and wish each and everyone of you a happy holiday season and a very fun filled and healthy 2010! We are looking ahead with BIG DREAMS and goals for this new decade ahead of us. Thanks for making our little space here on the internet a part of your day!

Happy Holidays,
Pam & Jen

LinkWithin

Related Posts with Thumbnails