Showing posts with label recipe. Show all posts

Tuesday, March 24, 2015

Peach Pancakes With Cinnamon Honey Butter {Recipe}

The kids are on Spring Break, so with all of us home the week I thought it would be fun to create a meal from a vacation destination. The kids often ask about Las Vegas, the bright lights, the shows and since Al and I have only been there once when we were first married I thought this might be a fun place to "pretend" to visit through food. 

 I decided to pick a dish off the menu from thWynn Resortin Las Vegas created by the famous chef Tai Ronnen.  The Wynn Resorts have a great menu, where I found my inspiration ... peach pancakes with honey butter! 

Here are my recipes to recreate this dish:
Cinnamon Honey Butter
1/2 cup room temp butter
1/8 cup honey
1/8 cup powdered sugar
1 teaspoon ground cinnamon
Using a mixer, beat together the butter and honey until combined, then slowly add the powdered sugar and cinnamon until smooth and creamy. *Refrigerate after use
Peach Compote
2qty 15 oz cans of sliced peaches with juice
1/3 cups light brown sugar
1/4 teaspoon lemon juice
Combine peaches with juice, brown sugar and lemon juice in a sauce pan and bring to a boil (watch carefully so it doesn't boil over). Turn down heat to a simmer until juice has thickened into a syrup. Keep warm until ready to serve. Refrigerate left overs. 
Cinnamon Applesauce Pancakes
2 cups Bisquick
2 tablespoons light brown sugar
2 teaspoons ground cinnamon
2 eggs
1qty 12 oz can Evaporated Milk
1/2 cup cinnamon applesauce
2 tablespoons vegetable oil
1 teaspoon vanilla extract
Combine dry ingredients in a bowl, combine wet ingredients in another bowl, then combine everything together. Using a 1/3 measuring cup, pour batter onto a lightly greased griddle. Sides will brown quicker, because of the sugar in the mix. 
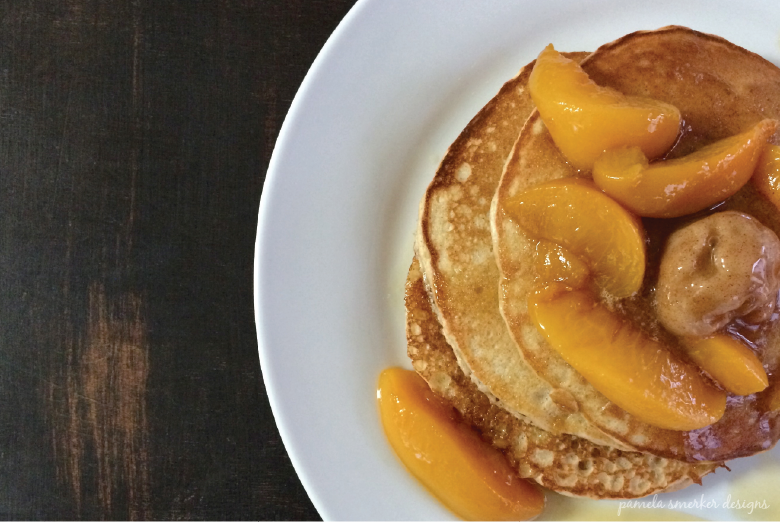
These three recipes work so well together and would be great on their own with other items. My family loved these pancakes and we are now excited to make our way to Las Vegas someday and try out chef Tai Ronnen's version at the Wynn Resorts. 

Wednesday, March 11, 2015

Super Soft Sugar Cookie Bars Recipe


I LOVE soft sugar cookies with buttercream frosting, but seriously dislike the time it takes to roll out the dough, cut into cute shapes and continue repeating until there is but a scrap of dough left. Then when you are finished doing all of that, which takes quite a bit of time, there is the frosting and finding enough room and plates to lay out all of those cookies so they can set enough to find a place to store them all. Are you still with me?? Seriously the pain is real! 

I was SO excited when I found the recipe for these sugar cookie bars over at Somewhat Simple. While their recipe is fabulous I decided to give it my own little twist.  By the looks of it, this recipe has been tweaked a few times as it has been passed around through Blogland. That is the great thing about recipes, you can make them your own!


Here is what you need:

Sugar Cookie Bar:
2 1/2 cups all purpose flour1/2 tsp baking powder1/2 tsp salt1/2 cup unsalted butter, softened1 cup sugar1 large egg2 heaping TBS sour cream1/2 tsp vanilla extract1/2 tsp lemon extract 

Buttercream Frosting:
1 cup butter, softened
3 cups powdered sugar 
1 tsp vanilla
2 TBS heavy cream

Beat butter, slowly adding powdered sugar then add vanilla. Use as much heavy cream as needed to reach desired frosting consistency. BONUS: Taste as you go, to make sure it's to your liking. 

Cookie Directions:
Preheat oven to 375 degrees. Place a sheet of parchment paper in the bottom of a 9" x 13" baking dish or pan, set aside. In a mixing bowl mix together flour, baking powder and salt, set aside. In a different bowl whip together with an electric mixer the butter and sugar until fluffy. Add the egg, sour cream, vanilla and lemon extracts until blended. Slowly add dry ingredients to the wet, until combined and form a dough. Gently press the dough onto the parchment paper in the pan so that it covers the bottom. Bake for 15-20 mins until the edges are lightly golden. Cool completely, then frost,  cut into squares and decorate if you like. Note: If you don't have parchment paper you can simply butter the bottom of your baking dish. I like parchment so I can pull the entire cookie out once baked, making it easier to frost and cut. 


I don't think I will ever do cut out sugar cookies again after making these. So easy and it takes such little time to put them together. PLUS, there are so many ways you can decorate these babies, which makes them perfect for any occasion! Give these a try and let me know what you think. 

DFTBA,
Pamela

Thursday, February 19, 2015

Tortilla Casserole Recipe

I have been making this dish for quite some time now and it is still one of our favorites. 


Tortilla Casserole

3 cooked chicken breasts cut up into bite size pieces
1 can Cream of Chicken soup
1 can Green Chili Sauce ( I use a small can of Stokes)
1/4 C Sour Cream

Tortilla chips
Shredded Lettuce
Shredded Mexican Cheese
Extra Sour Cream
Salsa

Combine the cooked chicken, cream of chicken soup, green chili sauce and sour cream. Spray a 9"x9" baking dish with cooking spray. Place a layer of tortilla chips in the bottom of your baking dish, then spoon the chicken mixture over the top. Sprinkle a 1/2 to 1 cup cheese over the top of casserole then bake at 350 degrees for 20-30 minutes or until bubbly. 


Serve casserole on top of a bed of shredded lettuce, top with salsa, shredded cheese & sour cream. Serve with a side of tortilla chips.

A great recipe that you can make ahead of time, refrigerate then bake later (within a day or two at the most).

Thursday, February 12, 2015

Breakfast Quesadilla Recipe


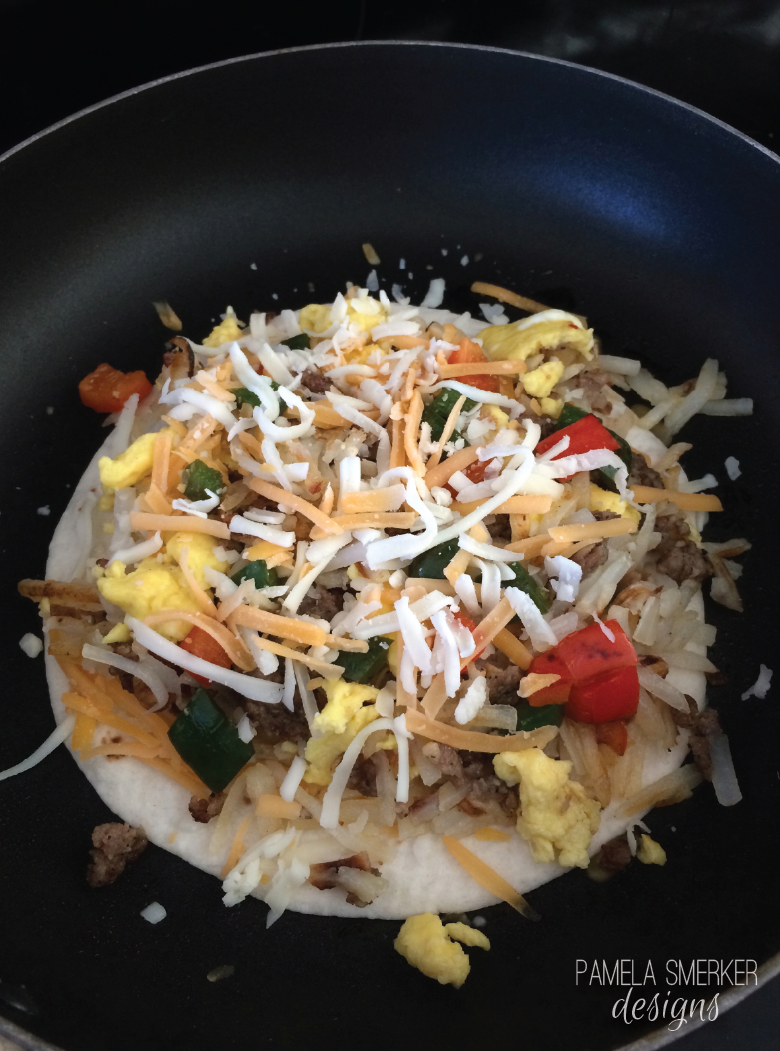
Sometimes when I am in a hurry or just not feeling inspired about making breakfast I create a hash of sorts. Scramble some eggs, brown some breakfast sausage and hash brown, maybe throw in some veggies, mix everything together and plate it.


Well I was feeling a little inspired and wanted to try something new. I buttered one side of a flour tortilla, placed it in a pan over medium heat, added a little shredded cheese, then piled on some of my hash, another sprinkle of cheese and to top it, another buttered tortilla. Flip the quesadilla over once the bottom side is browned and repeat.


These turned out really yummy and everyone loved them! Give them a try, make your own fun mix of food and see how it tastes inside a crispy tortilla sandwich!

Tuesday, August 19, 2014

In A Hurry Scrumptious Banana Muffins {Recipe}

My family loves banana bread, but sometimes we just don't have an hour to wait for a fresh loaf to bake. So I have started making what I call the "in a hurry scrumptious banana muffin". 


In A Hurry Scrumptious Banana Muffins
Makes approx. 12 muffins 

4 mashed ripe bananas
1/2 C white sugar
1 egg, beaten
1/3 C melted butter
1 tsp baking soda
1 tsp baking powder
1/2 tsp salt
1 1/2 C flour


Step 1. Preheat oven to 350 degrees F.
Step 2. Place parchment paper cupcake wrappers in a cupcake/muffin tin or use cooking spray in each cavity and set aside. 
Step 3. Whisk together the baking soda, baking powder, salt and flour together in a bowl and set aside. Step 4. In a separate bowl combine the mashed bananas, sugar, egg and butter together.
Step 5. Combine the dry ingredients with the wet ingredients and mix well. 
Step 6. Pour batter into muffin tin, filling each cavity approximately 2/3 full. 
Step 7. Bake for approximately 20 minutes and check with a toothpick. 


If you have any left over, place the extras in a ziplock bag and store in refrigerator or freezer. Feel free to add nuts or chocolate chips to your recipe. We like ours plain with melted butter fresh out of the oven!


Give them a try! 
DFTBA,

Pamela

Tuesday, August 12, 2014

Cherry Turnover Bites For The Win! {Recipe}

These sweet little treats were the perfect ending to a long day.


I may have actually jumped up and down with joy because I found this recipe from The Country Cook through Pinterest and it was SO GOOD!! I bet they would be delish with apple filling or even chocolate! YUMMY!! 

Hop on over to The Country Cook to get the recipe and give them a try.

DFTBA,
PS


Friday, August 8, 2014

Stir-Friday With Ramen Noodles {Recipe}

I have been making this dish a lot lately, because it's pretty easy and mostly because the hubby likes it a lot!


Stir Fry With Ramen
Serves 2-4

2 packages of Ramen (I use Top Ramen, just the noodles, not the seasoning pack)
1-2 chicken breasts cut into small pieces (about the size of a quarter and thin)
2 tbls Sesame Oil
5-6 baby carrots cut into quarters
1- 2 cups of snow peas
2 tbls soy sauce
1 tbls Spiracha chili sauce
1/2 C chicken broth

Directions:
1. Cook ramen noodles as directed drain and set aside.
2. With one tablespoon sesame oil brown the chicken, place in a dish and set aside.
3. Using second tablespoon of sesame oil saute the carrots for a minute then add the snow peas.
4. Mix together in a bowl the soy sauce, chili sauce and chicken broth
5. Return chicken to skillet along with the noodles. If your skillet isn't big enough this can all be done in a large pot.
6. Add sauce mixture, stir so that all ingredients are combined and noodles are covered and everything is heated through. If noodles are too dry and sticky, add a little more broth.


Give it a try and let me know what you think.

DFTBA,
PS


Tuesday, August 5, 2014

The Most AMAZING Chocolate AND Peanut Butter Cupcakes {RECIPE}


Seriously what could possibly be better then the combo of peanut butter and chocolate??? I have made chocolate cupcakes with peanut butter frosting before, but this time I decided to kick them up a notch with a layer of semi sweet chocolate. 


First I made the cupcakes with the recipe below:

Vegan Chocolate Cake
Yield 30 cupcakes
Preheat oven to 350 degrees

Combine in a large bowl
3 C Flour
2 C Sugar
6 Tablespoons Unsweetened Cocoa Powder
2 Teaspoons Baking Soda

In a separate bowl combine
2 Teaspoons Vanilla
2 Tablespoons White Distilled Vinegar
2/3 C + 1 Tablespoon Vegetable or Canola Oil
2 C + 1 Tablespoon Water

Pour wet mixture into dry mixture and combine until smooth. Place cupcake wrappers in cupcake pans.  Poor 1/4 C of batter into each cup. Bake for 16-18 minutes and test with toothpick. Let cool for 5 minutes on a wire rack them place in a container, cover and put them in the freezer until ready to frost. 

Next, the frosting:

Peanut Butter Frosting

Combine until smooth
1 C room temp Butter
1 C Creamy Peanutbutter
1 C Marshmallow Cream

Add
2 C Powdered Sugar
2 Tablespoons Heavy Whipping Cream

Next fill the cupcakes...


Since I made my cupcakes the day before and froze them, they were pretty solid.  I used a melon baller to scoop out a "well" in each cupcake for the frosting to go. Using a SMALL (maybe a tablespoon) ice cream scoop I added a heaping dollop of the frosting to the hole in the cupcake. I used the back of a spoon to push the frosting down into the hole a bit more and then smeared the extra around the top of the cupcake. 

Next, the melted chocolate topping


After I had all of the cupcakes filled with frosting I placed them in the freezer to set up. Using a double boiler I melted approximately 1 1/2  cups of semi sweet chocolate chips over low heat. Once chocolate was melted and smooth I pulled the cupcakes out of the freezer and added a tablespoon of melted chocolate to the top of each cupcake. 

When finished topping store cupcakes in refrigerator until ready to serve. The top will be nice and crunchy like a candy bar, the frosting will be creamy and the cake will be moist and flakey. You may want to eat this with a fork! 


So whatever shall you do with all of those scooped out holes of chocolate cake? Well you could use them to make cake pops OR do like I do... eat them with a spoonful of frosting! YUMMY!! 


Go ahead and give them a try.

DFTBA!
PS

Wednesday, June 4, 2014

Super Moist Gluten Free Cherry Chocolate Cupcakes

Over the weekend I needed a dessert that our friends would enjoy, that was gluten free. I had made gluten free chocolate cupcakes before using King Arthur Flour's chocolate cake mix, but decided to add a little kick of flavor with Duncan Hines Comstock Pie Filling.


Here is how I did it...

Super Moist Gluten Free Cherry Chocolate Cupcakes
Yield 24 - 30 Cupcakes

1 box of King Arthur Flour Chocolate Cake Mix
1 21oz can of Duncan Hines Comstock Cherry Pie Filling
4 eggs

Mix these three ingredients in a bowl until combined, trying not to mash all the cherries. Fill cupcake liners 2/3 full. Bake per instructions on the box. 

The Creamiest Chocolate Buttercream Frosting

2 3/4 C Powdered Sugar
6 tablespoons Unsweetened Cocoa Powder
6 tablespoons room temperature Butter
5 tablespoons Heavy Cream
1 teaspoon Vanilla Extract
*2-4 tablespoons of Milk (to loosen frosting if too thick)

Whisk together sugar and cocoa powder. Add butter, heavy cream and vanilla. If frosting is too thick, loosen with a tablespoon at a time of milk. 


Enjoy! 

DFTBA,
Pamela

Monday, June 2, 2014

Two Of My Favorite Things... Coffee Cake and Party Pretties


Today I am sharing two of my favorite things with you. The first is this cute "Cross + Plus" garland I was sent from The Flair Exchange.  I can't wait to put it in my new office space once we move (the packing process has started). Second is this sour cream & chocolate chip coffee cake, I have been eating this ever since I can remember and have been feeding it to my kids since they were little. Give it a try and while you are enjoying a piece hop on over to The Flair Exchange and do some shopping. 


Chocolate Chip Coffee Cake
Preheat oven 350 degrees

Cream together
1/4 C butter (room temp)
3/4 C sugar

Add:
2 eggs
1 C Sour Cream
1 tsp baking soda
1 1/2 C all purpose flour
1 1/2 tsp baking powder
Mix until combined, then add 1 bag of mini semi sweet chocolate chips. (Mini chips work best, because they won't sink to the bottom of the cake)
Pour into greased 9" square pan

Cinnamon Sugar Topping
1/2 C sugar
1 tsp cinnamon
Mix together then pour on top of cake batter to cover. 
Place cake in preheated 350 degree oven for approximately 30 minutes. Cake should be golden brown and when toothpick is inserted in center of cake, should come out clean.
Serve warm or at room temp.


DFTBA,
PS


Friday, March 14, 2014

After Dinner Mint Adult Drink Recipe

Want a refreshing and sweet drink to clean your pallet after dinner or with dessert? 
Give my "After Dinner Mint" drink a try. 


After Dinner Mint

  • 1 C Milk
  • 1 oz Creme De Menthe 
  • 1 oz Kahlua
  • Ice

Stir together and enjoy! 

DFTBA, 
PS

Thursday, February 27, 2014

Cafe Mocha Recipe

Is it strange to love the smell and flavor of coffee, but do not care to drink a cup of it? Well that is me, for some reason coffee by itself or even with cream and sugar doesn't do it for me. I am one of THOSE people who have to really doctor it up to drink it. So today I am sharing a Cafe Mocha recipe my son came up. More fluff then coffee, my kinda drink!


1 Tablespoon unsweetened Cocoa Powder (we use Hershey's Milk Chocolate)
1 Tablespoon sugar (regular ol' granulated white sugar)
1 Tablespoon hot water
Stir together in a coffee mug until it makes a syrup

Add and stir
1/3 Cup freshly brewed black coffee
3/4 Cup hot milk (heat in microwave anywhere between 30 seconds to 1 minute)

Add to the top (optional)
Whipped cream

We hope you enjoy!

DFTBA,
PS

Tuesday, February 4, 2014

Homemade Butterfinger Treats For Your Valentine

I love Butterfingers, especially FRESH ones. What better way to get FRESH ones then to make them yourself. You might be surprised like I was to find out what the ingredients are, just three ingredients! 


I used this recipe from Recipe Boy, only I cut it in half and instead of dipping chocolate I melted milk chocolate chips. TIP: If you find that your chocolate chips get a little thick add a teaspoon of shortening, that will help loosen up the chocolate to make coating easier. 


For this batch of Butterfinger balls, (it was actually an oops) I actually made the full batch (according to Recipe Boy) 2 cups of peanut butter and 2 cups of Candy Corn. I poured the melted mixture in a parchment lined 8' x 8" pan. I then covered them and put them in the fridge over night. They stayed really soft, so I turned the pan out onto a cutting board, cut mixture into 1" pieces then took those pieces and rolled them into balls. I tried melted semi sweet chocolate chips to cover these and they are so good. Since they were super soft, I have just kept them in the fridge and even cold these are nice and chewy when you bite into them. 

Wrap some up with this FREE tag I designed for D & P Celebrations (you can download the "For You Heart" tag here) A fun little treat for a friend or loved one this Valentine's day. 

DFTBA,
PS

Thursday, December 15, 2011

Pumpkin Donuts {Recipe}

Over the weekend the kids asked for pumpkin pancakes AGAIN! (normally I make these only once a year, a Thanksgiving morning tradition of ours)


 So, I gave in (wasn't that hard to give in since I love them as well) and while mixing up the batter thought, I really should see how this would work in my Bella donut maker. OH MY WORD!!!! Forget making pancakes....these are da' bomb!!


Typically with our pumpkin pancakes we top them with chocolate chips and whipped cream (the kids like to make smiley faces). While I thought of adding the chocolate chips to the tops of the donuts, the thought of chocolate ganache sounded irresistible. Add a dollop of whipped cream and hello...HEAVEN!!! 


These would make an amazing dessert (we loved them for breakfast, but they are pretty sweet) and with this recipe you can make approximately 4.5 dozen mini donuts. YES, over 50 donuts and sadly enough the three kids and I ate ALL of them! They cook in 2 mins, and are a big softer and more moist then a regular cake donut, but seriously oh so good! Let me know if you try this and what you think. 

Here is the recipe again for those of you who missed it.

Pumpkin Donuts
2 C Bisquick
2 Tbls brown sugar
2 tsp ground cinnamon
2 eggs
1 can evaporated milk (12oz)
1/2 C cooked or canned pumpkin
2 Tbls vegetable oil
1 tsp vanilla

Mix all dry ingredients together, then add wet ingredients. Pour into machine, per manufacturers directions. 

Chocolate Chip Ganache 
1/2- 1 C semi sweet chocolate chips
1-3 Tbls whipping cream

Melt chocolate chips over double boiler or in microwave (in 30 sec intervals, so not to burn the chocolate). Stir in enough whipping cream until you get a smooth glossy consistency.

***Tomorrow's Post***
Check back in tomorrow, I have some news...major changes going on around here, yes AGAIN!! 

Hugs, 
Pam

Wednesday, December 29, 2010

Bring On The Cake!

Today's post should pretty much cover it all when it comes to cakey goodness.  A great Vegan cake recipe, cupcake favors and cupcake decorations!


First up, this fun printable Cupcake Party collection created by Zboooh Design Studio. I love the gingham pattern used in this set and thought it would look adorable displayed on my daughter's play kitchen. I love using my kids favorite toys as props and this worked out perfectly.


The tags in this collection reminded me of old time jelly jar labels, which got me inspired...Cupcake In A Jar! I love sending home favors and this one is just so fun. Who wouldn't want to go home with a cupcake or two to enjoy later. I used a pint size mason jar, which fits two cupcakes with plenty of frosting. Take off the cupcake wrappers, place one cupcake in the bottom, pipe on some frosting, add some sprinkles and repeat each step a second time. Print out the label, cut and adhere to the front of the mason jar, SUPER EASY! I spruced it up a bit by adding a cupcake topper printable to the lid along with some gingham ribbon in three different colors along with a cupcake pick for decoration.


You can read more about this collection over at MG Party Impressions, where I have posted all of the details. This collection will also be available in my Etsy shop on January 10, 2011, customized, printed and assembled just for you!!

Now for the best chocolate cake recipe I have ever made...tasted...ok...drooling over here! My Mom made this cake for me growing up and I never realized the whole time that is was Vegan...which has been a nice little bonus for all of my friends with food allergies or of course who are Vegan. This cake is super easy to make, dense and moist.

Quick Chocolate Cake
Combine in large bowl
  • 3 C flour
  • 2 C sugar
  • 6 tbls cocoa (either milk chocolate or dark, both are delicious)
  • 2 tsp baking soda
  • 1 tsp salt
Add
  • 2 tsp vanilla
  • 2 tbls vinegar
  • 2/3 C + 1 tbls vegetable oil
  • 2 C + 1 tbls warm water
Beat well and pour into greased 9"x 13" pan. Bake at 350 degrees for 30-35 minutes.


For my son's birthday yesterday I used this recipe to make his 5 layer cake (2 batches). Here you can only see 4 of the layers. OH and of course I ruined the Vegan-ness of this cake by adding buttercream frosting.
The recipe for buttercream is the most amazing I have made which came from Brandi of Tweedle Dee Designs. I could literally eat a bowl of this frosting with a spoon. I would most likely feel like crap after, but yes it is that good!

Buttercream Frosting
Beat together
  • 1 C butter
  • 3 C powdered sugar
  • 2 Tbls Heavy Cream
  • 1 tsp vanilla 

I added about 1- 2 Tbls Hershey Syrup to get the brown I wanted for this cake, plus it added a hint of chocolatey goodness to the recipe. SO GOOD!!

Alright, hope you have been inspired to think out side of the box with your favors, displays and a new recipe...I am off to eat some cake! WHAT...its lunch time...

Hugs,
Pam

Tomorrow...Tyler's Owl Party, here's another sneak peak...

Tuesday, September 14, 2010

Potluck Anyone?

I think potluck parties are the best! First of all you don't have to spend all day making tons of food. The best part, you can spend more time "preparing the stage" with fun decorations and favors. These invitations are a great way to tell each guest what they are responsible for bringing. Typically I always make the main dish, that way if someone ends up being sick last minute you are without a salad or dessert, not the most important part of the meal. When you are asking guests to bring something be specific. Most people will appreciate you saying "could you please bring a fruit salad" OR " would you mind bringing a chocolate dessert". If you simply tell three guest to bring a side dish, chances are you will end up with three dishes full of leafy salads.

So prepare the main dish, the beverage center, and of course a favor for your guests to take home. It doesn't have to be anything fancy or expensive. HGTV suggested filling cellophane bags with sweets then decorating them to match the party invitation, like they have done in these photos. Too cute!

What kind of dishes do you like to bring to potlucks? I of course love to bring a dessert and one of my favorites especially in the summer is Bishops Pie. I got this recipe from my Mom who said it was from the Bishops restaurant in Iowa where she grew up. It is super easy, cool and refreshing.

Bishops Pie
2 C milk
2 small boxes of instant pudding (1 chocolate 1 vanilla)
2 C vanilla ice cream (thawed just a bit so its easy to mix)

Make a simple graham cracker crust in a 9x13 pan. My Mom says to use enough graham crackers crumbs to fill the bottom of the pan about half an inch high and use enough melted butter to make the crumbs moist. Its homemade...nothing is really measured out. LOL!! You can also buy two pre-made round graham cracker pie crusts and continue with recipe.
Put milk & pudding in a mixer then blend in ice cream. Pour over crust and chill. Before serving top pudding mixture with a layer of cool whip and sprinkle with chocolate curls.  Cut and serve like pie!
*I use a vegetable peeler and a chocolate candy bar to make my curls. Any left over pie must be kept refrigerated.

If you make this, please stop by and leave me a note telling me what you think. I would love to hear from you!

Tomorrow starts BLOGMANIA!! I am part of the "Save the Date for a Party" team. 2 days of prizes galore over at Save the Date for Cupcakes! 

Speaking of prizes don't forget to check out yesterday's post and leave a comment for your chance to win a LUCKY LIFE Parties hostess kit!! Danielle has another prize on her blog today, so go check that out!!

Have a great day!!
Hugs,
Pam

LinkWithin

Related Posts with Thumbnails